

Key Takeaways
Why Exterior Clues Matter Before Any Seller Disclosure
Sellers are not always required to volunteer full damage history, and vehicle history reports — while useful — only capture incidents that were formally reported to insurers or authorities. That leaves a real gap. Learning to read a car's exterior gives you an independent source of evidence that doesn't depend on disclosure or documentation.
The exterior inspection is not about catching sellers in dishonesty; it's about gathering your own data. A car with past accident repairs is not automatically a bad purchase, but you need to know what you're buying to assess risk and negotiate accordingly. Combined with a history report and a mechanical inspection, the body walkthrough is one leg of a three-part due diligence process.
For a broader framework of what to assess when viewing any used vehicle in person, see the used car inspection points every buyer should know.
What you will need
Flashlight or phone torch
Raking light across body panels at a low angle reveals surface irregularities invisible in flat lighting.
Paint depth gauge (thickness meter)
Measures the thickness of paint over metal to detect areas where filler or extra paint coats have been applied after repair.
Vehicle history report
Cross-references visible exterior clues with disclosed accident, title, or structural damage records.
How to Read the Body Step by Step
The following steps build on each other — start with lighting and angle, then move systematically around the car before opening any doors or panels. Rushing straight to paint color or panel gaps without first establishing the right vantage point causes you to miss clues that a slower, structured approach catches reliably.
Choose the right lighting and viewing position
Park the car perpendicular to direct sunlight or position it under even artificial light. Crouch to hood height and look along each panel at a low, raking angle. This technique — sometimes called sidelighting — turns subtle waves, dips, and texture changes into visible shadows that flat overhead lighting completely masks.
Inspect panel gaps for consistency
Walk around the entire car and compare the gap between every adjacent panel pair: hood-to-fender, door-to-door, trunk-to-quarter panel. On a factory-assembled car these gaps are engineered to be uniform on both sides. Use your fingers as a rough gauge — if the gap on the driver's side is noticeably wider or narrower than the passenger's side equivalent, the body structure or mounting points may have shifted after a collision. Pay special attention to where the hood meets both front fenders simultaneously.
Look for paint bubbles and surface rust
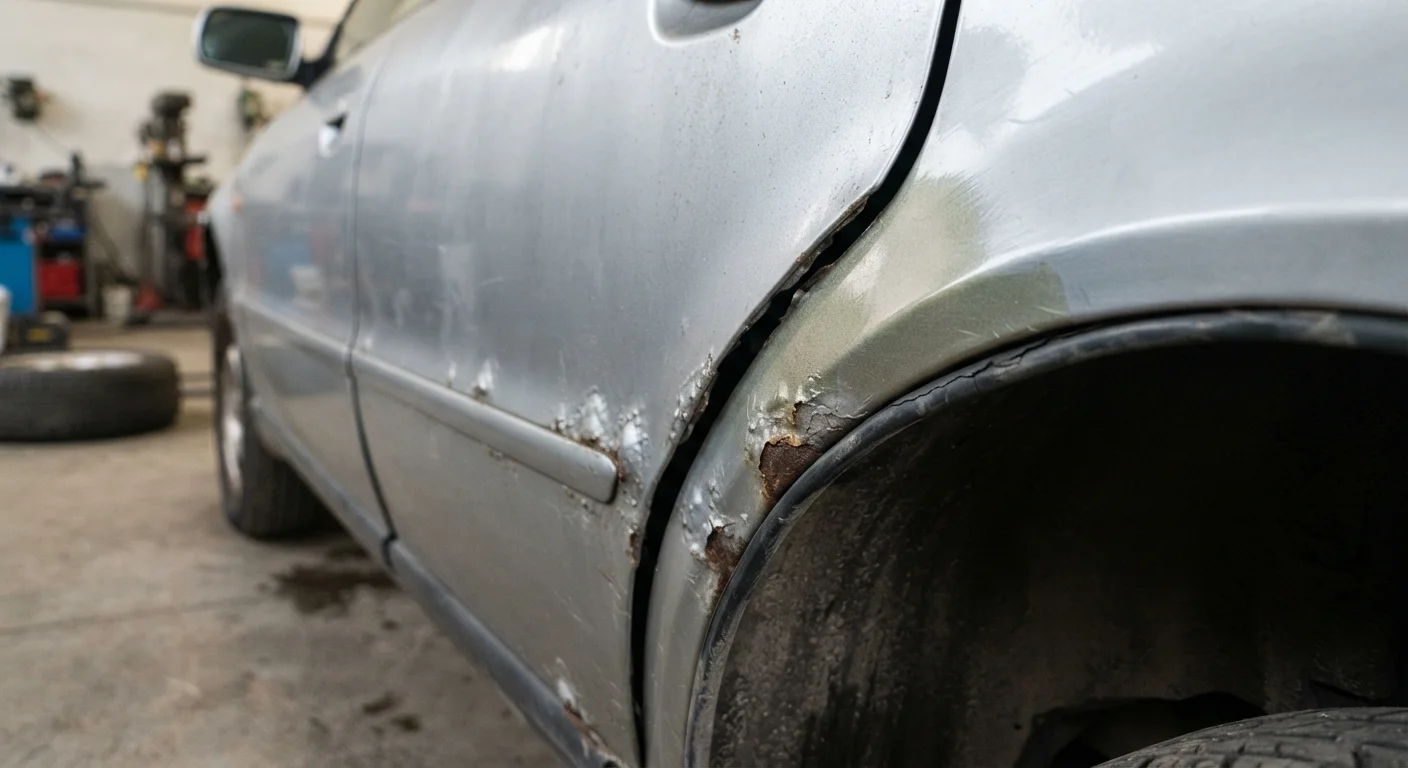
Paint bubbles — small raised blisters, often clustered near seams, wheel arches, door bottoms, or windshield edges — are caused by moisture working under the paint layer and oxidizing the metal beneath. Early-stage rust appears as small brown or orange spots; advanced rust creates soft, spongy areas that flex under finger pressure. Check lower door sills, the underside of the trunk lip, and the edges of the wheel arches where road debris traps water.
Detect mismatched paint and texture
Stand at one end of the car and look along the entire side in one sightline. Repainted panels often show a slightly different sheen, color tone, or orange-peel texture compared to original factory paint — even when the color match is close. Check door jambs and the inside edges of hoods and trunks: factory paint covers these recessed areas consistently, while spray-and-blend repairs often stop at the visible surface. A paint depth gauge can confirm suspicion by showing significantly thicker readings on a repaired panel.
Check for overspray and masking lines
Open every door, the hood, and the trunk. Look at the rubber seals, plastic trim, and hinges for fine mist of paint — called overspray — that landed outside the intended area during a body repair. A thin film of color on door seals or hinge bolts that doesn't match the surrounding surface is a dependable indicator of panel repainting. Also look for sharp paint edges at trim lines or under hood lips where tape was used to mask adjacent areas.
Examine body lines and panel contours
Every modern car has defined styling lines — character lines, creases, and curves — that run continuously across multiple panels. Crouch at each corner and trace a styling line from one panel into the next. A repaired or replaced panel that isn't precisely aligned will show a kink, offset, or abrupt change in the line's path. Even a 2–3 mm mismatch is visible once you know what to follow. This is particularly telling on doors and quarter panels where lines carry across long distances.
Cross-reference findings with the vehicle history report
Any exterior clues you find should be compared against the vehicle's documented history. A repainted quarter panel that aligns with a disclosed minor collision is a very different situation from one that appears on a vehicle the seller claims has never been in an accident. Reading the vehicle history report carefully helps you determine whether disclosed incidents match the severity suggested by what you're seeing on the body. Discrepancies between visible damage evidence and a clean history report are a serious negotiating concern and warrant independent verification.
Cosmetic Repairs Can Hide Structural Issues
A car can look visually acceptable after a significant collision if the body shop focused on appearance rather than underlying structure. Paint and panels can be made to look nearly factory-correct while frame rails, crush zones, or mounting points remain compromised. Exterior inspection reduces risk but does not eliminate it — a professional structural assessment is the only way to confirm frame integrity.
Combine Visual Checks With a Pro Inspection
A trained eye at the right angle catches a lot, but a pre-purchase inspection by an independent mechanic adds an undercarriage view, frame rail check, and structural assessment that no visual walkaround can replicate. Budget $100–$200 for that inspection before committing to any significant purchase. It is general-purpose due diligence, not a guarantee of the vehicle's condition.
Putting It All Together: Interpreting What You Found
A single exterior clue rarely tells the whole story. One repainted door could mean anything from a minor parking lot scrape to a significant side-impact repair. The pattern of clues matters: multiple mismatched panels on one side, combined with uneven gaps and overspray on the door seals, tells a more coherent story than any individual observation alone.
Prioritize findings by location. Damage or repair evidence on structural areas — the A-pillar, B-pillar, firewall, rocker panels, and frame rails — carries more consequence than cosmetic damage to easily replaced parts like bumper covers or side mirrors.
If your walkthrough surfaces meaningful concerns, a systematic interior and undercarriage assessment is the logical next step before any negotiation. And remember: the exterior is only one layer. Engine bay warning signs can tell a parallel story about how a vehicle was maintained or repaired after a collision.
Undisclosed Accident History Affects More Than Price
A vehicle with undisclosed prior structural damage may handle differently, crumple less predictably in a future collision, and carry title or resale complications. This is not just a negotiation factor — it is a safety consideration. If your exterior inspection raises serious doubts that the seller cannot explain with documentation, involving an independent mechanic or walking away are both reasonable responses.